WordPress is the most popular CMS in the world. It’s a handy solution for many website owners, not only because it’s so versatile and easy to use, but also because of the huge community that supports it. In this article, we will learn how to install WordPress through HostPanel.
Even if you don’t know how to do a certain WordPress job, you just need to do a Google search. There are many people who are ready to help you with all your questions, and experts have written step-by-step tutorials that can guide you.
Despite the readily available tech support, however, some tasks are still quite daunting for many users. Manually installing WordPress, for example, involves uploading and extracting a WordPress zip file, creating and configuring a database, and then linking that database to the WordPress installation by editing the WordPress Config file(wp-config. php) Many inexperienced website owners are reluctant to attempt this themselves, and for those who have done it dozens of times, it’s a hassle for them too. Which they definitely want to give up.
We know that most people who are starting work on their new project are eager to get started as soon as possible, which is why customers who go for one of our managed hosting solutions get the Softxaa WordPress Manager tool for free. With it, they can install WordPress with a few clicks and configure it to run reliably and securely.
How to Install WordPress via Softxaa WordPress Manager
HostPanel aims to enable you to start working on your project immediately. Not surprisingly, installing WordPress on a server doesn’t take more than a few clicks. Here are the steps:
- Log in to HostPanel’s user interface. The default login URL is https://domain.com/hostpanel. (use your actual domain name instead of domain.com).

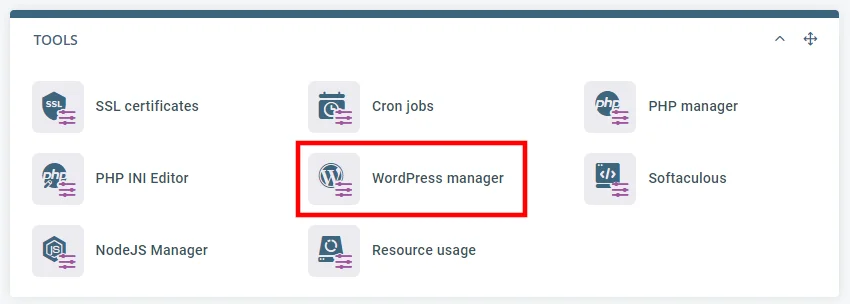
HostPanel Login Page - Open the Softxaa WordPress Manager. An all-in-one WordPress management tool for setting up and managing WordPress installations is available under the Tools section on HostPanel’s homepage.

Open the Softxaa WordPress Manager - Configure the new installation. Softxaa WordPress Manager gives you an easy-to-understand interface to configure the most important aspects of your WordPress installation. After you select the installation URL, you have the option to select the most popular WP plugins. If you want to use them, Softxaa WordPress Manager will automatically install them for you. Finally, you need to select login credentials for WP Dashboard.

Install WordPress Through HostPanel - Click the Install WordPress button. If you’re happy with the configuration, you can click the WordPress Install button and allow HostPanel for a couple of seconds to set everything up. After the installation is complete, it will display a confirmation message and send an email to the administrator’s address.
Manage your WordPress installations with Softxaa WordPress Manager
Softxaa WordPress Manager is not just a WordPress installer. At the bottom of the page, you’ll see all the WordPress installations currently in your account. Next to each of them, there are a few toggle switches.
The auto-update toggle ensures that any latest updates to WordPress core and installed themes and plugins are automatically applied. Keeping this feature enabled is highly recommended as updated software is the only way to make sure that known security vulnerabilities do not affect your website.
Speaking of security, next to Auto Update, you have the Security Lock toggle. This is a unique Softxaa WordPress Manager feature that locks your website files and prevents anyone from modifying them. With this enabled, hackers cannot inject malicious code or upload new files.
By default, this is turned off as it may hinder the installation of new plugins and themes. However, we recommend that you enable it as soon as you launch your website. If automatic updates are turned on, Softxaa WordPress Manager will turn off the security lock feature whenever updates are available and re-enable them when their installation is complete.
From the Actions drop-down menu, you can remove the WordPress installation, change its admin password, or clone it to another location in your account.


